10 steps to Installing Linux Mint in VirtualBox
CREATING THE VM
There
are plenty of options to choose from when creating a VM. For now though, you
can set up a VM adequate to run Mint Cinnamon
and perform well.
Step
1
With
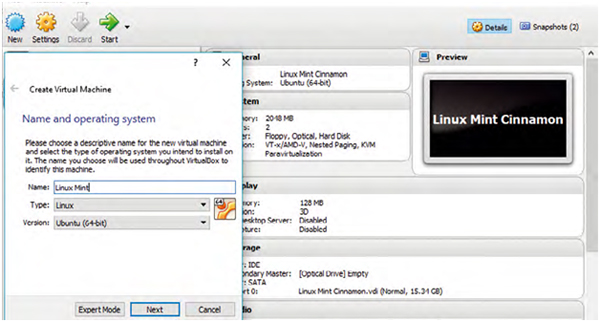
VirtualBox open, click on the New icon in the
top right of the app. This will open the new VM
Wizard.
Step 2
In
the box next to Name, type Linux Mint and VirtualBox
should automatically choose Linux as
the Type and Ubuntu (64-bit) as the Version. If not then use the
drop-down boxes to select the correct settings; remember Mint
mainstream is based on Ubuntu. Click Next when you’re ready to
proceed.
Step 3
The
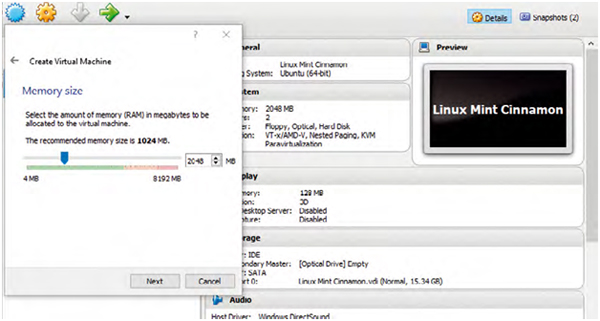
next section will define the amount of system memory
(RAM) the VM has allocated. Remember this
amount will be taken from the available memory installed in your
computer, so don’t give the VM too much. For example, we have
8GB of memory installed and we’re giving 2GB to the VM. When
you’re ready, click Next to continue.
Step 4
This
section is where you start to create the virtual hard
disk that the VM will use to install Mint on to. The
default option, ‘Create a virtual hard disk now’, is the one we’re using.
Click Create to move on.
Step 5
The
pop-up window that appears after clicking Create
is asking you what type of virtual hard disk you
want to create. Use the default VDI (VirtualBox Disk Image) in his
case, as the others are often used to move VMs from one VM application
to the next. Make sure VDI is selected and click Next.
Step 6
The
question of whether to opt for Dynamically or
Fixed sized virtual hard disks may come across as
being somewhat confusing to the newcomer. Basically, a Dynamically
Allocated virtual hard disk is a more flexible storage management
option. It won’t take up much space within your physical
hard disk to begin with either. Ensure Dynamically Allocated is
selected and click Next.
Step 7
The
virtual hard disk will be a single folder, up to the size
you state in this section. Ensure the location of
the virtual hard disk, on your computer, has enough free space available.
For example, we’ve used a bigger storage option on our D:\
drive, named it Linux Mint and allocated 25.50GB of space to the virtual
hard disk.
Step 8
After
clicking Create the initial set up of the VM is
complete; you should now be looking at the newly
created VM within the VirtualBox application. Before you begin
though, click the Settings button and within the General section
click the Advanced tab. Using the pull-down menus, choose ‘Bidirectional’
for both Shared Clipboard and Drag’n’Drop.
Step 9
Follow
that by clicking on the System section, then
the Processor tab. Depending on your CPU allocate
as many cores as you can without detriment to your host system;
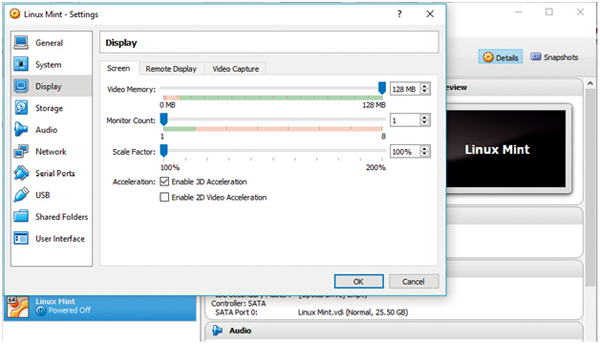
we’ve opted for two CPUs. Now click on the Display section, slide
the Video Memory up to the maximum and tick ‘Enable 3D Acceleration’.
Click OK to commit the new settings.
Step 10
Click
on the Start button and use the explorer button
in the ‘Select Start-up Disk’ window to locate
the downloaded ISO of Mint; the explorer button is a folder with
a green arrow. Click Start to boot the VM with the Linux Mint Live
Environment. You can now install Linux Mint as detailed in the previous
Installing Linux Mint on a PC section.


0 Response to "10 steps to Installing Linux Mint in VirtualBox"
Post a Comment