How to Set Up C++ in Windows
Windows users have a wealth of
choice when it comes to programming in C++. There are loads of IDEs and compilers
available, including Visual Studio from Microsoft.
However, in our opinion, the best C++ IDE to begin
with is Code::Blocks.
Code::Blocks
Code::Blocks is a free C++, C and
Fortran IDE that is feature rich and easily extendible with plugins. It’s easy
to use, comes with a compiler and has a vibrant community behind it
too.
Step 1
Start by visiting the
Code::Blocks download site, at www.codeblocks.org/downloads.
From there, click on the ‘Download the binary
releases’ link to be taken to the latest downloadable version
for Windows.
 |
| How to Set Up C++ in Windows - 1 |
Step 2
There you can see, there are
several Windows versions available. The one you want
to download has mingw-setup.exe at the end of
the current version number. At the time of writing this is:
codeblocks-17.12mingw-setup.exe. The difference is that the
mingw-setup version includes a C++ compiler
and debugger from TDM-GCC (a compiler suite).
 |
| How to Set Up C++ in Windows - 2 |
Step 3
When you’ve located the file,
click on the Sourceforge.net link at the end
of the line and a download notification window
appears; click on Save File to start the download and save the
executable to your PC. Locate the downloaded Code::Blocks installer
and double-click to start. Follow the on-screen instructions to begin the
installation.
 |
How to Set Up C++ in Windows - 3 |
Step 4
Once you agree to the licencing
terms, a choice of installation options becomes
available. You can opt for a smaller install, missing out
on some of the components but we recommend that you opt for the Full option, as
default.
 |
| How to Set Up C++ in Windows - 4 |
Step 5
Next choose an install location
for the Code::Blocks files. It’s your choice but the
default is generally
sufficient (unless you have any
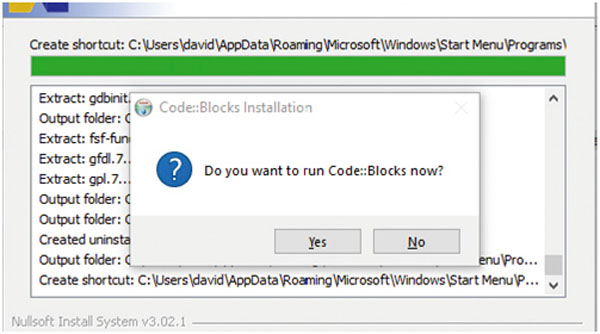
special requirements of course). When you click Next, the install begins; when it’s finished a notification pops up asking you
if you want start Code::Blocks now, so click Yes.
 |
| How to Set Up C++ in Windows - 1 |
Step 6
The first time Code::Blocks loads
it runs an autodetect for any C++ compilers
you may already have installed on your system. If
you don’t have any, click on the first detected option: GNU GCC
Compiler and click the Default button to set it as the system’s
C++ compiler. Click OK when you’re
ready to continue.
 |
| How to Set Up C++ in Windows - 1 |
Step 7
The program starts and another
message appears informing you that Code::Blocks
is currently not the default application for C++
files. You have two options, to leave everything as it is or allow
Code::Blocks to associate all C++ file types. Again, we would recommend
you opt for the last choice, to associate Code::Blocks with every supported file
type.
 |
| How to Set Up C++ in Windows - 7 |
Step 8
There’s a lot you can do in
Code::Blocks, so you need to dig in and find a good C++
tutorial to help you get the most from it. However, to
begin with, click on File > New > Empty File. This creates a new, blank window for you
to type in.
 |
| How to Set Up C++ in Windows - 8 |
Step 9
In the new window, enter the
following:
- #include <iostream>
- Int main()
- {
- //My first C++ program
- Std::cout << “Hello World!\n”;
- }
Notice how Code::Blocks auto-inserts the braces and
speech quotes.
 |
| How to Set Up C++ in Windows - 9 |
Step 10
Click File > Save as and save
the code with a .cpp extension (helloworld.cpp,
for example). Code::Blocks changes the view to
colour code according to C++ standards. To execute the code,
click on the Build and Run icon along the top of the screen. It’s
a green play icon together with a yellow cog.
 |
| How to Set Up C++ in Windows - 10 |

0 Response to "How to Set Up C++ in Windows"
Post a Comment